
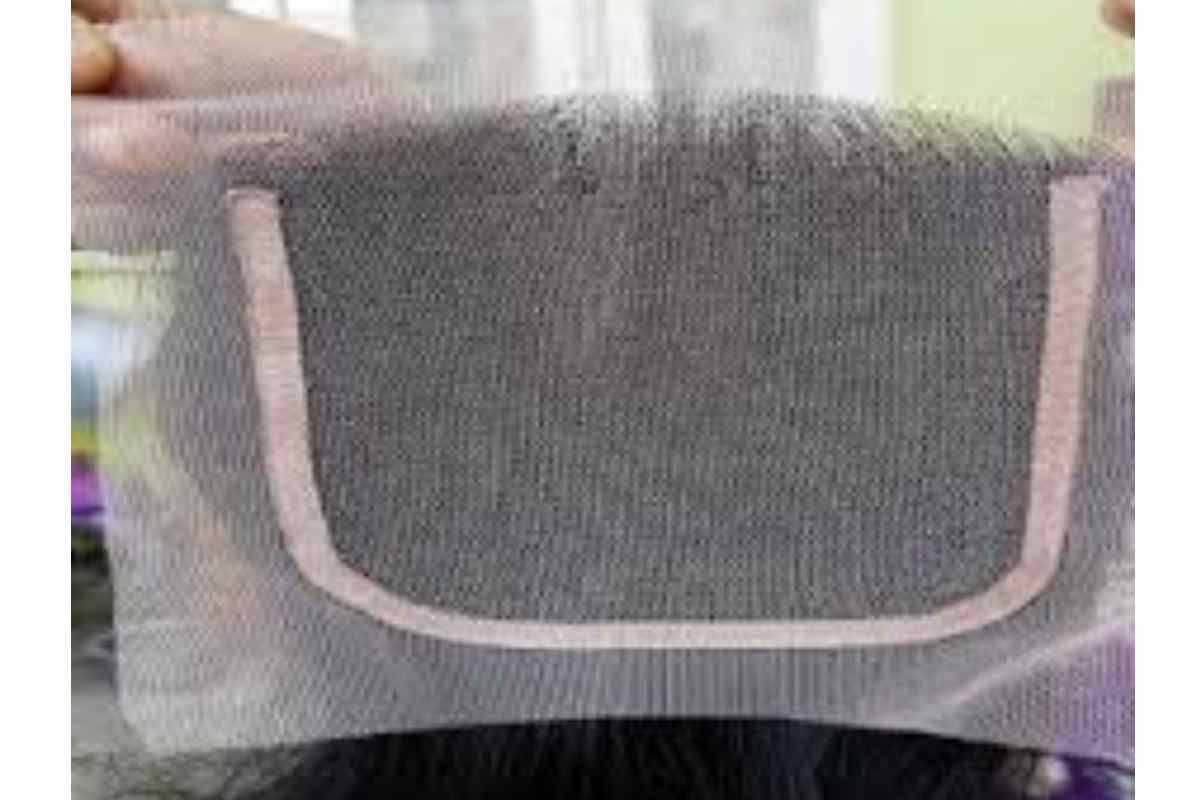
An HD (high-definition) lace closure is a small hairpiece, typically 4 4 or 5 5 inches, manufactured out of ultra-fine, sheer lace, with human hair filaments tied into it. The lace is slimmer and more transparent compared to other versions of lace, which means when applied properly will lie literally flat against the body. Closures are sewed or glued to make up a natural looking section without revealing the entire scalp; they are perfect in completing a sew-in, strengthening a wig or quickly making up an area of a part that could not be noticed.
Important technical notes:
- The distinctive aspect is lace thinness: HD lace is fine and shineless.
- The bottom of each strand of hair is frequently bleached so as to minimize that pitted appearance on the head.
- Patients and Constructs: The most natural closure appears to be a hand-tied one; machine-made closures are less realistic but cheaper. https://www.privatelabelextensions.com/blogs/closures/choosing-hd-lace-closure
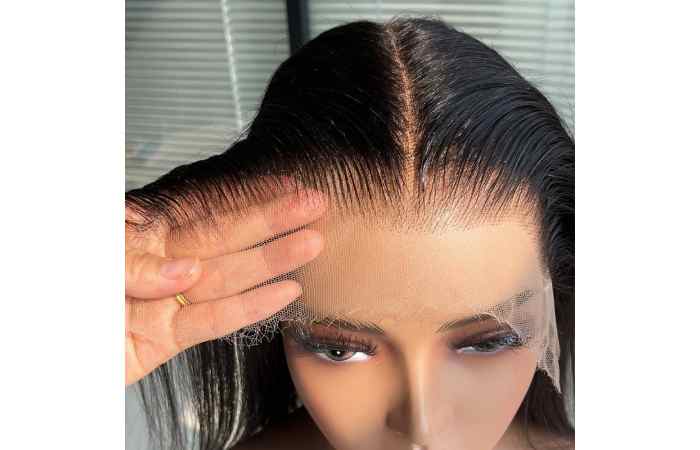
Table of Contents
Why HD lace looks so natural (and when it doesn’t)
HD lace appears invisible for two main reasons:
- Transparency — the material lets your skin tone show through, so there’s no visible “web” between hair strands and scalp.
- Thin profile — it lies flatter against the skin, eliminating the tiny ridge that thicker laces can create.
But realism depends on three small, often overlooked steps:
- matching or tinting the lace to the wearer’s scalp color,
- bleaching knots so dark dots don’t show through,
- and customizing the hairline with sparse baby hairs rather than a straight, unnatural edge.
Skip any of these and HD lace will still be better than basic lace, but not perfect.
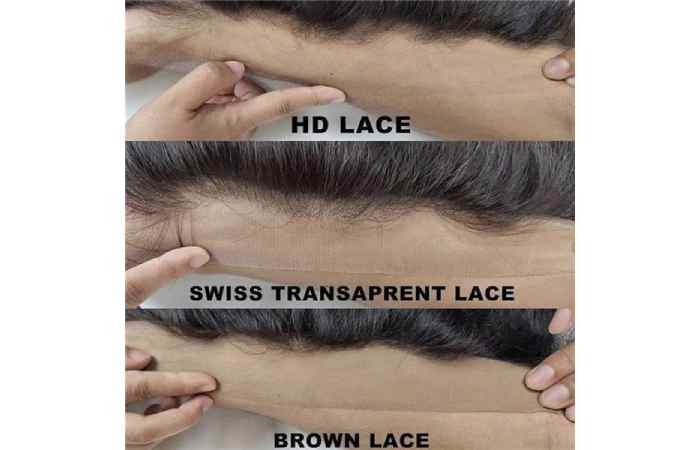
HD Lace vs Other Lace Types — clear comparison
| Feature | HD Lace | Swiss Lace | French Lace | Basic Lace |
| Sheerness | Very high (most transparent) | High | Moderate-High | Low–Moderate |
| Comfort / breathability | Excellent | Very good | Good | Varies |
| Durability | Less (requires gentle care) | Good | Stronger | Most durable |
| Ideal for cameras / close-up | Excellent | Very good | Good | Not ideal |
| Price (general) | Higher | Mid-high | Mid | Lower |
Short verdict: pick HD lace for the most natural, camera-ready look. Pick Swiss or French lace if you need a balance of realism and durability. Pick basic lace only on a tight budget or for short-term wear.
Closure vs Frontal — choose based on coverage and style
| Question | Closure | Frontal |
| Coverage area | Small (4×4, 5×5) | Ear-to-ear (13×4, 13×6) |
| Best for | Defined part, crown coverage | Full hairline replication, high parting versatility |
| Styling freedom | Restricted to the closure area | High — can part and style across the whole front |
| Installation complexity | Easier | More complex |
| Cost | Lower | Higher |
If you want to mimic a small patch of scalp — a natural middle part or crown — choose a closure. If you plan to wear hair swept up, parted deeply on either side, or pulled back, a frontal gives more options.
Sizes, construction, and what each means
Common sizes
- 4×4 closure: Compact; good if you only want a small, realistic part.
- 5×5 closure: Extra parting room without the complexity of a frontal.
Construction aspects
- Hand-tied: Individual strands knotted by hand — most realistic and flexible.
- Machine-tied: Rows sewn by machine — denser, less natural, cheaper.
- Silk base vs lace: Silk bases sit under a thin layer that mimics scalp color; good for realism but less sheer than HD lace.
Knots
- Bleached knots minimize the appearance of dark dots where strands emerge from the lace.
- Single vs double knots: Single knots look more natural but can be less secure; double knots last longer but are more visible if not bleached properly.
Buyer’s checklist — pick an HD lace closure that performs
| Factor | What to inspect / ask |
| Lace quality | Is it super sheer but intact (no holes)? Ask for close-up photos. |
| Hair type | Remy/virgin human hair for styling longevity. |
| Knot condition | Are knots pre-bleached? If not, are they bleachable safely? |
| Density | Does the density match a natural hairline? Avoid overly thick closures. |
| Return policy & reviews | Transparent returns, clear photos/videos, and verified buyer feedback. |
Always ask the seller for close macro photos of the lace against a hand or skin tone; this shows sheerness better than distant shots.
Customizing HD lace closure — step-by-step (recommended)
A raw HD closure straight out of the package rarely looks perfect. These steps make it photoready.
- Prepare your scalp and braids (if sew-in). Braid hair flat or use a wig cap. Clean the area so adhesive adheres well if gluing.
- Trim excess lace. Cut along the hairline carefully, leaving 1–2 mm to avoid cutting knots.
- Bleach knots (if needed). Mix a gentle developer and powder bleach; apply only to the knot area. Rinse fully and neutralize. Tip: don’t over-process — it weakens the knots.
- Tint the lace. Use a lace tint spray, fabric dye diluted to skin tone, or a thin layer of foundation/powder to match your scalp.
- Pluck the hairline. Use tweezers to remove small clusters gradually — less is more. Aim for irregular spacing to mimic natural growth.
- Apply adhesive / sew down. For sewing, stitch along the perimeter into your braid. For glue installs, use skin-safe adhesive and follow cure times.
- Create baby hairs. Trim a few short strands at the front and lay them with edge control to frame the face naturally.
- Blend the part. Use a small amount of concealer or powder along the part for depth; set with a fine translucent powder.UNice HD Lace Closure Collection!
Installer’s note: Perform these customizations in small stages. Plucking and bleaching are permanent alterations — better to adjust slowly than to overdo.
Installation methods — overview and when to use each
Sew-in closure (most common for closures):
- Pros: secure, long-lasting, minimal glue on the scalp.
- Cons: requires braiding and a skilled stitcher to avoid bulky seams.
Glue/tape install (common for wigs and quick installs):
- Pros: smooth edge and immediate full hairline finish.
- Cons: adhesives can irritate sensitive skin; edges must be re-glued every 2–4 weeks.
Combination (tape + sew):
- Pros: extra security for active lifestyles.
- Cons: more time-consuming to remove.
Choose the method based on how long you want the style to last, your scalp sensitivity, and your activity level.
Maintenance plan — keep the illusion for months
| Frequency | Task |
| Daily | Lay baby hairs, avoid heavy oils on the lace, use a silk scarf at night. |
| Weekly | Lightly clean scalp near the part with alcohol wipes (if glue is used). |
| Every 1–2 weeks | Apply edge control gently and re-tie/press baby hairs. |
| Every 2–4 weeks | Replace adhesive for glued installs; deep condition the hair. |
| Monthly | Inspect lace for thinning or lifting; consider re-tinting part. |
Washing tips: Use sulfate-free shampoo. Cleanse by soaking the hair and moving water downward — don’t rub the lace area with nails. Condition mid-length to ends, avoid heavy conditioners on the lace.
Troubleshooting — common problems & exact fixes
Lace looks shiny or plastic.
- Fix: Powder the lace with translucent setting powder or re-tint with matte makeup. Avoid greasy products near the lace.
Knots are visible after installation
- Fix: Carefully apply a small amount of concealer/tint around the part and diffuse with a brush. If knots are still too obvious and unbleached, consider a professional bleaching session.
Lace lifts at the edges
- Fix: Clean the skin thoroughly, remove old adhesive residue, reapply a thin, even layer of skin-safe glue, and allow proper cure time before pressing the lace down.
Closure tears
- Fix: Small holes can be patched with a tiny lace patch and medical adhesive by a professional. Prevention (gentle handling) is better — avoid tugging and high-heat stress on the base.
Cost realities — what to expect
Costs vary with hair length, density, and grade. These are general ranges (USD equivalent) and will differ by market:
- 4×4 HD lace closure (human hair, mid-range): $30–$120
- 5×5 HD lace closure (virgin Remy): $60–$180
- Customization services (bleach, tint, pluck): $20–$100 depending on stylist skill and location
If a closure is sold extremely cheaply, check for synthetic fibers, poor knot work, or overly dense hair — all signs of lower quality.
Styling ideas that show off HD lace
- Sleek middle part bob: Shows how invisible the part can be when knots are bleached and the lace is tinted.
- Soft, face-framing waves: Movement helps sell realism; make sure to use low heat and protectants.
- Half-up, low pony: Keeps the closure hidden while showing off a natural part.
- Deep side part with baby hairs: A slightly irregular, deep side part looks very mature and realistic when customized.
Avoid extremely tight high buns that expose inner lace edges unless you’ve fully secured and blended them.
FAQs
Can I dye HD lace hair?
Yes, if the hair is human. Test a strand first. Tinted lace (the base) is best adjusted with makeup or lace tint sprays — don’t try to dye the lace fabric itself.
Will HD lace last longer than Swiss lace?
Not necessarily. HD lace is more sheer but also more fragile. With careful care, HD closures can last as long as Swiss lace—but they require gentler handling.
Is HD lace good for oily skin?
It can show shine more easily. Keep the scalp clean, avoid oils near the hairline, and consider a silk or satin-lined cap when sleeping to reduce sweat buildup.
How long do installations last?
Sew-ins can stay 6–12 weeks with upkeep. Glued installs often need attention every 2–4 weeks. Longevity depends on hair quality and maintenance.
Final words
HD lace gives you the possibility of an invisible hairline — but the result comes from small, intentional steps: matching the lace to the skin, bleaching knots carefully, plucking the hairline in natural patches, and choosing the correct install method for your lifestyle. In content and photography, those tiny details (a dusting of powder in the part, a single baby hair curving naturally) are what convince an audience that the hair is real.